When you have decided if a match is correct or not you can approve or reject a match suggestion by clicking on the Approve / Reject check boxes in the last 2 columns of the grid.
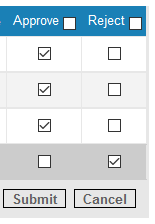
You can also approve all the matches in the current view, by clicking the ‘Approve’ check box to the right of the ‘Approve’ column heading. Likewise, you can reject all suggestions by clicking on the ‘Reject’ check box to the right of the ‘Reject’ column heading.
If you make a mistake you can cancel all changes by clicking on the ‘Cancel’ button or simply change the specific row. Please note that you must Submit or Cancel any checked items before you go to the next page or change the filters.
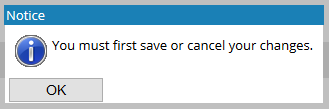
If you do not do this, the system will show a warning that you must first submit or cancel your changes.
Once you’ve gone through each of the recommendations by ticking the relevant Approve or Reject check boxes, you must click on the Submit button to commit those matches to the system.
Rejected matches are removed from the report and any approved matches are stored in the system.
(Rejected items are temporarily hidden within the system until the match suggestion routine is next run. The routine will consider a rejected match and upon completion, will suggest the next most alike match.)
Rejected items can be found within the filters mentioned in the Using Filters section by selecting (Y) from the ‘Rejected’ drop down menu – this is one of the filters located just above the grid and to the right of the retailer URL field. Selecting this allows you to see the items that have been rejected. Therefore, if you have made a mistake or now know that this product is ‘matchable’, you can make amendments through this filter.